What Is a Video Source? How to Add Phone Footage to OBS
Learn what source footage and video sources mean in live streaming, then connect a phone, camera, or remote encoder to OBS safely.
By VISP Team ·
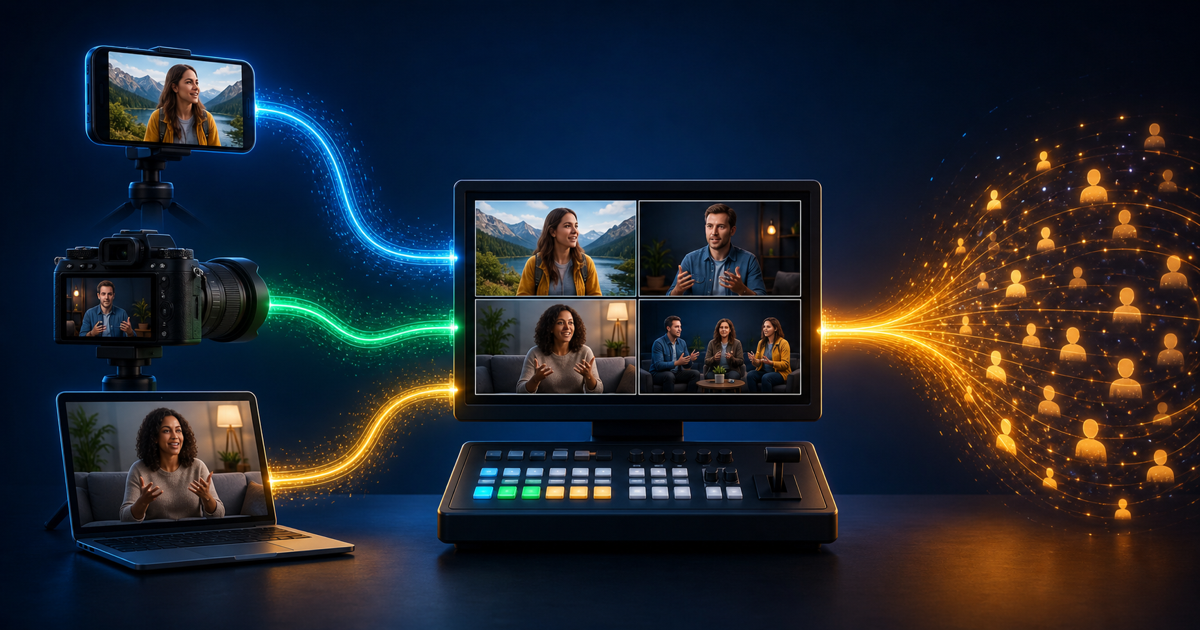
A video source is one input used to build a live production. It can be a phone camera, capture card, remote guest, media file, browser page or another computer's program feed. OBS combines those sources in scenes, mixes their audio, adds graphics and sends one finished program to Twitch, Kick or YouTube.
“Source footage” usually means the original camera recording or contribution before final editing and graphics. “Video src” often refers to the src attribute that tells a web video element which file to load. These phrases sound similar, but a creator trying to bring a phone into OBS normally needs a live video source, not an HTML setting.

Video source, source footage, and finished program
The easiest way to understand the terms is to follow one shot through a show. A phone records a street performer. The phone's encoded camera and microphone feed is the live source. OBS crops it, adds a lower third, mixes music and cuts between that phone and a studio camera. OBS's canvas is the program. The encoded file saved by the phone or OBS becomes footage for later editing.
| Term | Meaning in a live workflow | Example |
|---|---|---|
| Video source | One live or stored input available to production software | Phone camera in OBS Media Source |
| Source footage | Original recorded or contributed material before the final edit | Camera file or clean remote feed |
| Scene | A saved arrangement of one or more sources | Phone full-screen with chat overlay |
| Program output | The finished mix sent to viewers | OBS stream to Twitch or Kick |
| Video src | Web-development shorthand for a media URL | File assigned to an HTML video element |
The distinction matters when troubleshooting. If the source freezes before OBS, changing the platform output bitrate does not repair it. If OBS preview is smooth but viewers buffer, the source may be healthy and the problem may be on the final output leg.
How a remote phone becomes an OBS source
A capture card works because the camera and OBS computer are close together. A remote phone needs a reachable network endpoint between field and studio. The phone encodes H.264 video and AAC audio, publishes them through a transport such as SRT, and OBS receives the stream over the internet.
VISP provides that middle path. Create a named device under Video sources. The phone receives a publishing URL, while OBS receives a separate reading URL. Both connect outward to the relay, so the home router does not need an inbound SRT port. The Twitch or Kick stream key stays in OBS.
The current VISP video-source documentation covers source creation and credentials. The encoder setup guide covers third-party apps, SRT latency, SRTLA and OBS fallback behavior.
Choose the sending device
Four practical senders cover most remote-camera jobs.
VISP native app: the shortest path when you want the built-in camera, stream status, chat and selected OBS controls. A claimed device is configured without manually pasting the full URL. Its optional dual-link mode duplicates packets across Wi-Fi and cellular for failover; it does not add their capacity.
Moblin: an open-source iOS encoder supporting SRT, SRTLA and other protocols. Use it when you want its camera controls or SRTLA multipath behavior. The Moblin-to-OBS guide walks through a VISP source.
Larix Broadcaster: a mature mobile encoder with SRT, RTMP and adaptive bitrate controls. It is useful when the field operator already knows Larix or needs its detailed encoding settings. Follow the Larix SRT guide.
IRL Pro: an Android IRL encoder documented with SRTLA workflows. It can use a VISP SRT or SRTLA publishing URL; see the IRL Pro tutorial.
You can also use OBS on another computer as the sender. That approach contributes one flattened program rather than separate camera layers. The OBS-to-OBS SRT guide explains the tradeoff.
Create the video source in VISP
Sign in, open Video sources, choose Add device, and name the source by its stable role: “roaming Android,” “stage wide camera,” or “guest entrance.” Avoid naming it after today's event if the same camera will return next week.
The dashboard produces different credentials for publishing and reading. Copy Add this to video source into the sending encoder. Keep the complete address private: its stream ID contains the right to publish to that path. Do not show it in screenshots or paste it into public troubleshooting messages.
SRT is the default because it can retransmit lost UDP packets inside a chosen latency window. Use RTMP from the Advanced view when the sender's network blocks UDP or the encoder does not support SRT. Switching protocol cannot fix a link whose sustained upload is below the chosen video bitrate.
Only one active publisher can own a device path. Give each phone or encoder its own source rather than sharing one URL. Separate paths make revocation, monitoring, OBS layout and failure diagnosis much clearer.
Configure source footage for a predictable relay
Use H.264 video, AAC audio, constant bitrate and a two-second keyframe interval unless the current encoder or destination documentation requires something else. Pick resolution and frame rate after testing the real phone and route. A stable 720p30 source is better footage than an unstable 1080p60 claim.
VISP relay-to-OBS does not transcode. The relay forwards what the encoder sends, so compatibility errors must be fixed at the sender. If OBS cannot decode the source, check the codec and container before changing unrelated scene settings.
Leave upload margin. A speed test shows a momentary maximum, not guaranteed video capacity while moving. Test at the same place and time as the broadcast, then set contribution bitrate below the result you can repeat. The mobile bitrate guide explains how to separate field upload, home download and final OBS upload budgets.
Add the source to OBS
The simplest route is the generated scene collection. Download it from VISP, then in OBS choose Scene Collection → Import. It contains a fallback scene and a reconnecting Media Source scene for each active device.
For a manual source:
- Reveal and copy the device's OBS reading URL.
- In OBS, choose Add Source → Media Source.
- Clear Local File.
- Paste the reading URL into Input.
- Use mpegts as Input Format if the generated URL does not supply it.
- Start the phone and confirm both motion and audio in OBS.
These steps follow the official OBS SRT guide. The OBS URL is not the publishing URL. Giving the phone the read credential or OBS the publish credential creates a confusing failure and weakens the intended separation.
The VISP OBS plugin can also add named devices and accept selected remote controls. It polls outward over HTTPS, so the studio does not expose an inbound control port. The phone can switch program scenes or start and stop the active OBS stream, but it does not receive the platform stream key.
Put the source in a scene without hiding its limits
Once the feed moves, crop and scale it on a dedicated source scene. Then nest that scene inside program scenes instead of repeating the raw Media Source in many places. This makes color correction, delay and audio changes easier to manage.
Keep only one intended audio path. If both the Media Source and a separate audio capture carry the phone microphone, viewers may hear echo or comb filtering. Use headphones while testing monitoring, and confirm the final recording rather than trusting moving meters alone. The phone audio troubleshooting guide isolates capture, relay and mix problems.
A remote source is not synchronized automatically with local cameras. Network recovery and decoder buffering add delay. If lip sync or a multi-camera cut matters, measure with a clap and delay the earlier source rather than guessing.
Build a fallback for missing source footage
An internet video source will eventually reconnect. The viewer-facing broadcast does not have to end with it. Keep OBS live and show a local BRB or studio scene while the field feed is stopped. Advanced Scene Switcher can react to the Media Source playback state after a short debounce.
Test the failure before going live:
- Start the phone and watch stable motion and audio.
- Disable its active network.
- Confirm OBS changes to the local fallback without ending the platform stream.
- Restore the network and wait for the source to reconnect.
- Cut back only after motion and audio are stable.
SRT can recover short loss while packets remain useful. It cannot send through a complete dead zone. Real network bonding, a second camera, or a longer local fallback solves a different layer of the problem.
Protect and maintain the source
Treat publishing and reading URLs as passwords. Rotate a single device's publish access when that device changes hands or its URL leaks. Rotate the account-wide OBS read credential only when you intend to update every OBS source that uses it.
Document the source name, sender app, codec, bitrate, orientation and recovery test. Do not document the secret URL in a shared show sheet. A stable source is not merely one that worked once; it is one the team can identify, revoke, test and restore.
The complete signal path
For a conventional home-OBS workflow, the chain is:
Phone camera → H.264/AAC encoder → SRT or SRTLA publishing path → VISP relay → OBS Media Source → scenes and audio mix → Twitch, Kick or YouTube.
Every arrow is a checkpoint. Confirm the phone preview, VISP device state, OBS preview and platform player separately. That method finds a failing layer much faster than changing settings everywhere.
If you have a phone and an OBS studio ready, try VISP by creating one named video source. Keep the first test off-air, record it in OBS, interrupt the network once, and verify that the same source returns. You will then have reusable source footage rather than a link that only worked in a living-room demo.
Bring the field into your OBS studio
Try VISP free during beta. You never have to paste a stream key anywhere.
Try VISP free